
 Tweet
Tweet
I just got a new set of Coilovers from BC racing and I took pictures of the install and wanted to share this in case there was anyone out there that wants a quick easy how-to. By no means is this 100% thorough, but it covers all the major points of the install. Be safe and use proper tools and jackstands.
1.Start by loosening lugs. Then Jack up the car and support it with jackstands.
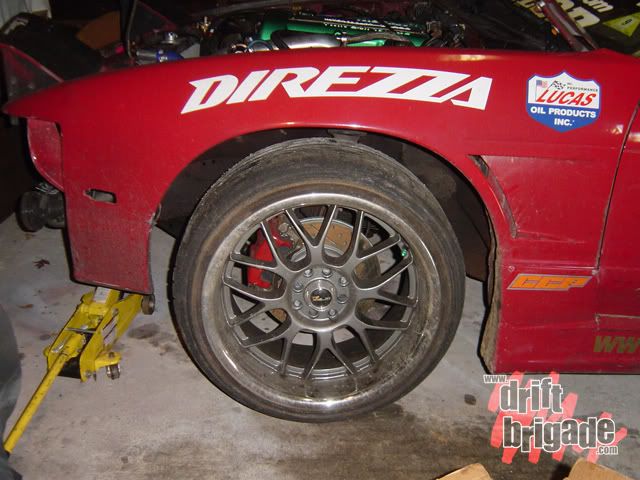
2.Remove wheel to make things easier to work on
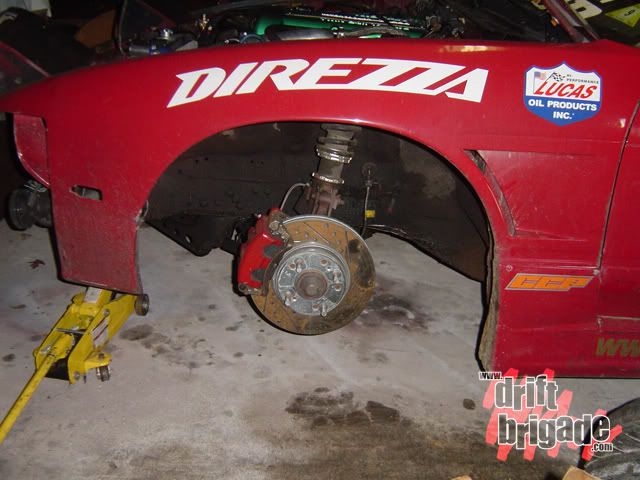
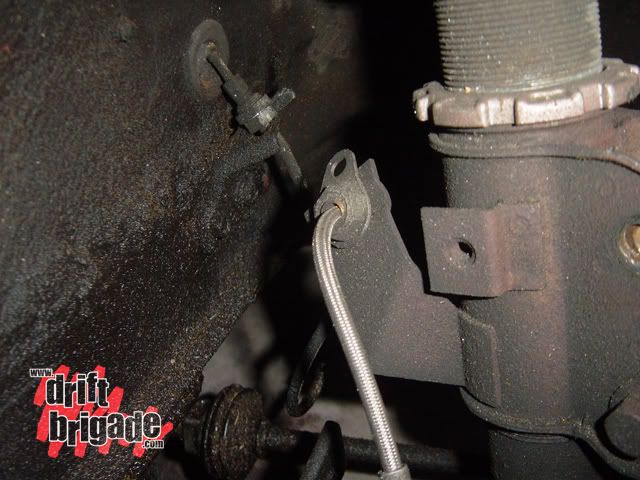
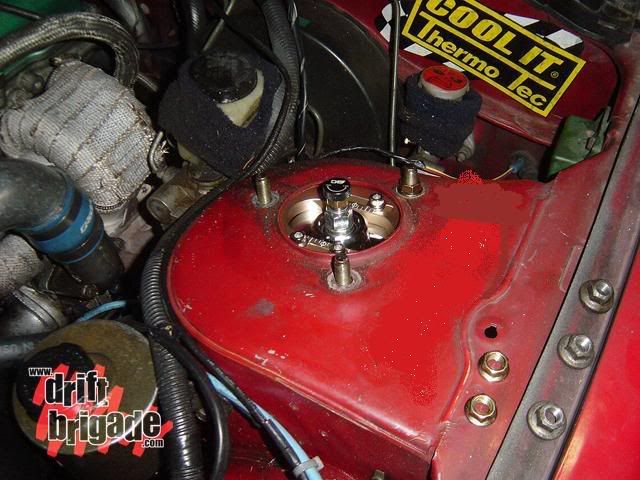
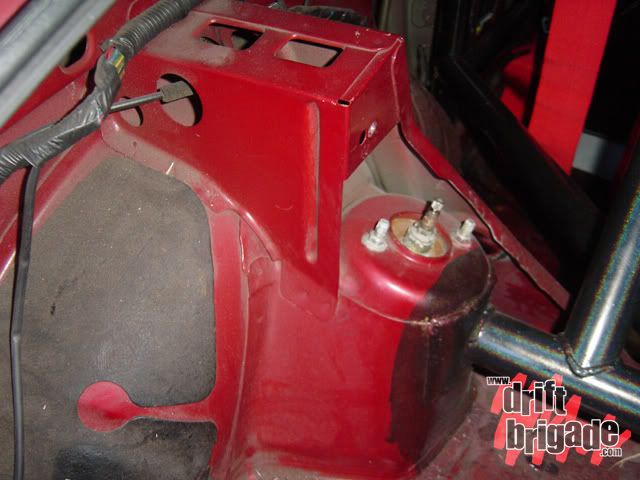
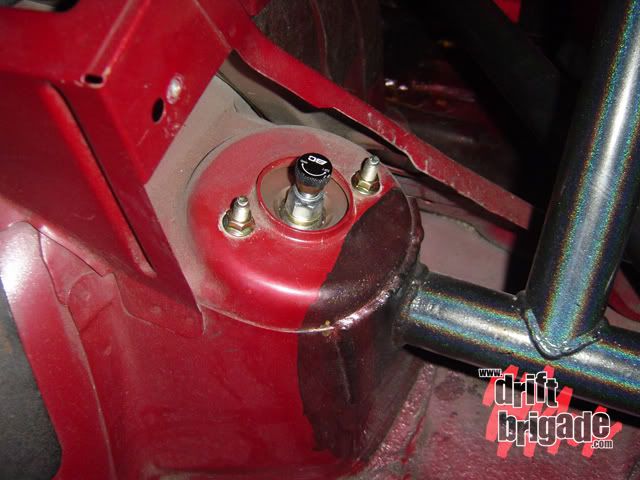
3.These 3 nuts on the strut towers will be removed.
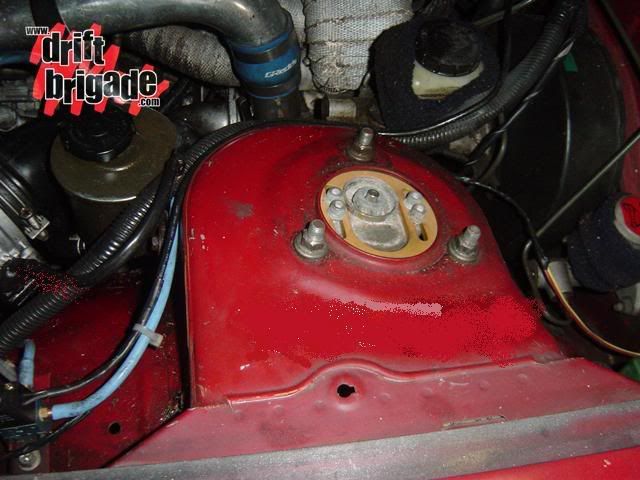
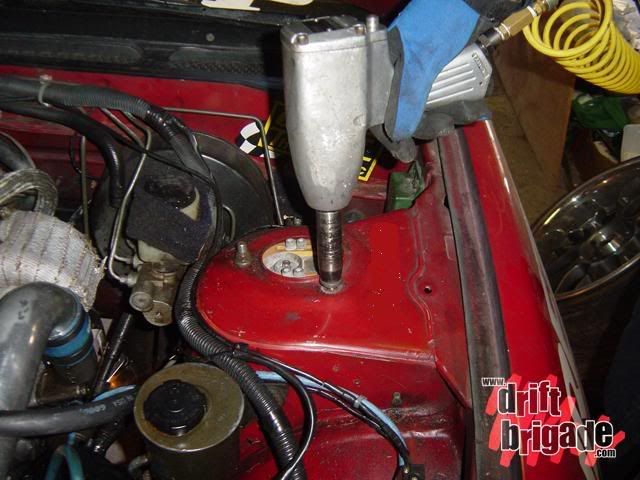
4.Loosen the nuts. You will remove these after getting bottom half of coilovers unbolted.
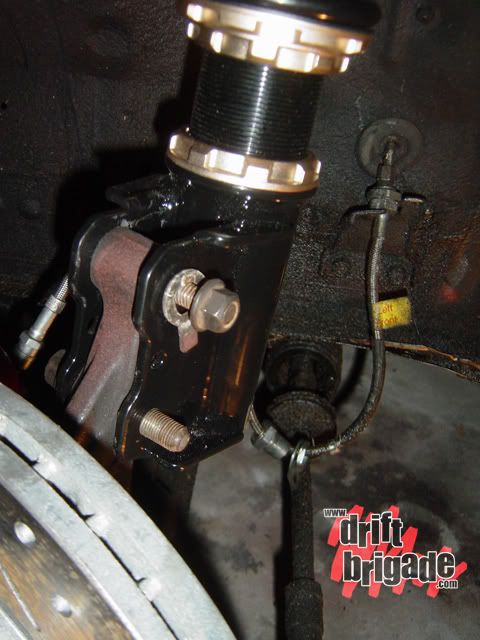
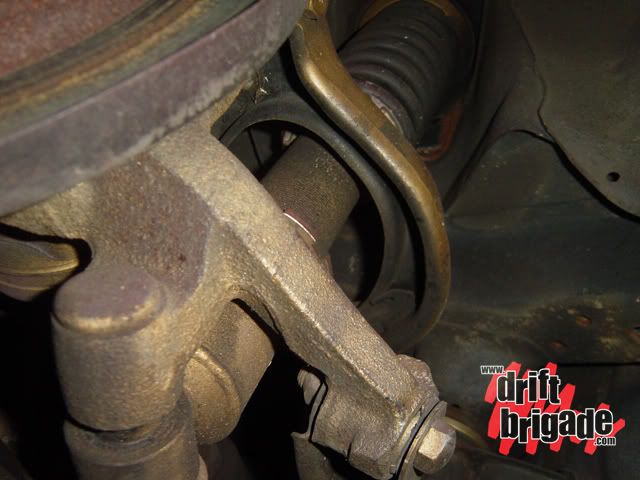
5.You will need to remove brake line from coilover.
6.After it is removed, you are ready to unbolt lower half of coilover.
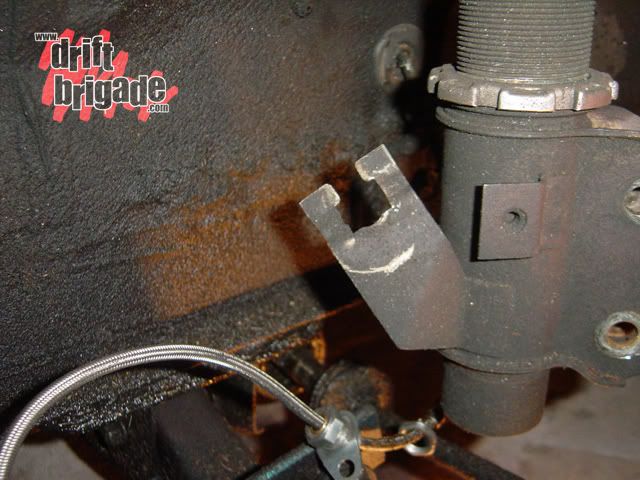
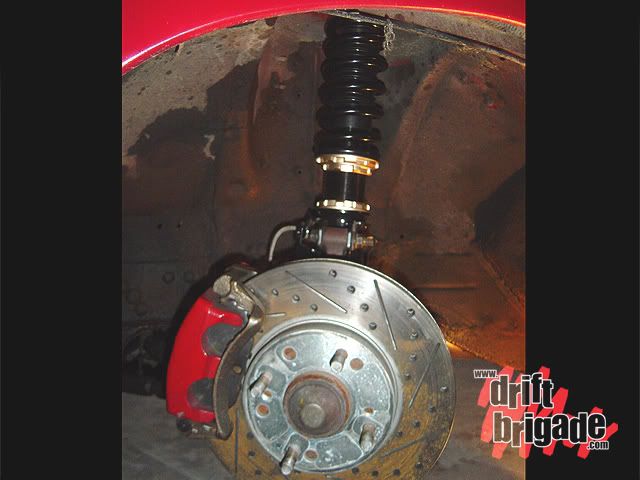
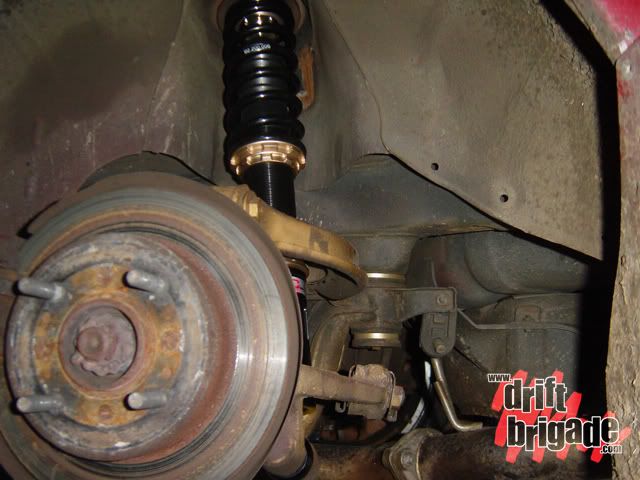
7. Loosen and remove the 2 nuts and bolts holding the coilover to the hub assembly.
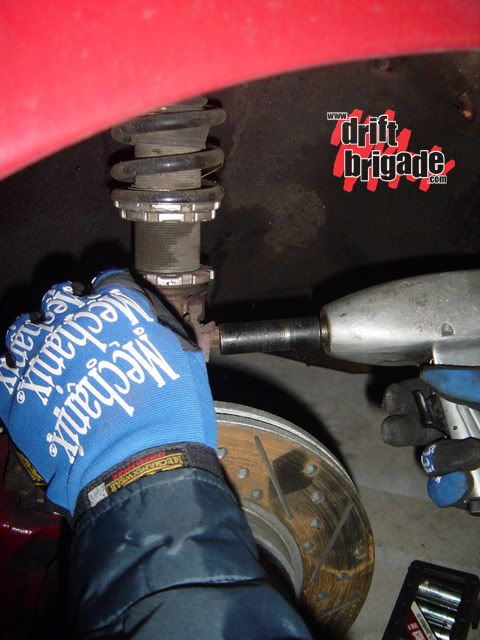
8.Pull hub assembly away from coilover. You can now remove the 3 nuts completely off the tower. Pull the coilover out.
9.Grab the new coilover and feed it underneath the shocktower and make sure it is facing the right way and that you are installing the correct side. Yes, Left and right are different.
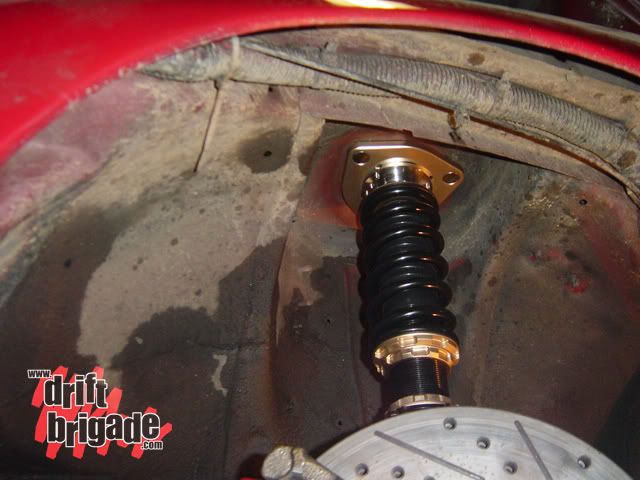
10.Make sure that the coilover is seated correctly by looking at top of shocktower.

11.You can hold the coilover assembly by finger tightening the nuts. This will allow a little play which will make bolting the lower half easier.
12.Next, you will want to feed the hub assembly into the coilover and install the nuts and bolts.

13.You can now tighten the 2 nuts and bolts. Note: If using camber eccentric bolt, you will want to make sure that these bolts are tight because bolt can slip and cause coilover to hit wheel depending on your offset. (don't ask how I know) Even if it is very tight, you will want to recheck after a few miles of driving as driving will wear off the powdercoating under the head of the nut causing it to lose grip. After that, you're all set.
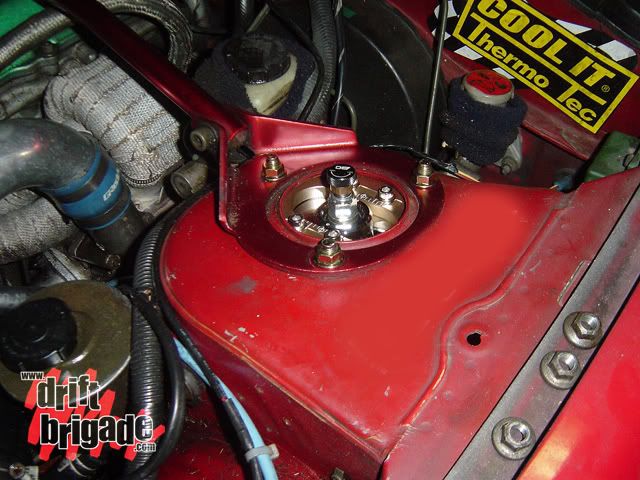
14.Next tighten the 3 nuts on the shock tower. This is also a good time to install a strut bar if you want.
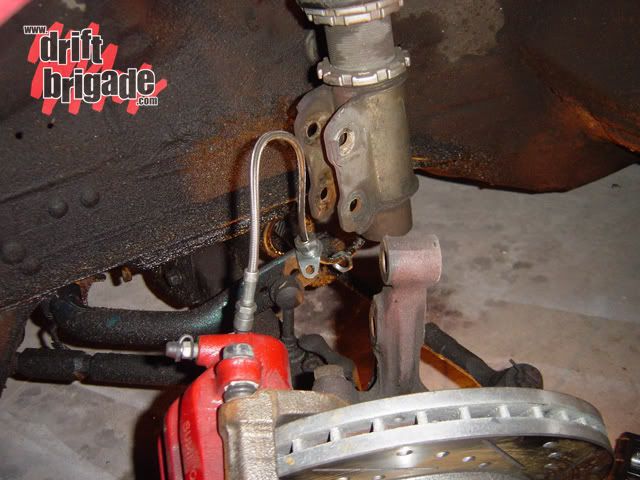
15.You can now tighten the brake line onto the coilover and move the steering wheel back and forth to make sure everything clears.
16.Rears are very easy, same idea as front but less to remove. You will remove these 2 12mm nuts.
17.Remove the big nut and washer holding the lower part of the coilover to the arm. After you slide the coilover off the lower bolt you will notice it is hard to snake out if not using a lift. You can take it out by standing on the brake assembly to pull it down. This gives more clearance to pull it out through the wheel well.
18.Snake through the new coilover using same technique as removing it. Feed the two studs through the shock tower and slide the lower part of the coilover on the arm bolt. Install washer and nut, then tighten.
19.Finally, tighten the 2 nuts onto the shock tower. You may want to adjust the settings at this time. First, turn it all the way to the right. Then count back to desired setting. Counter clockwise makes the setting softer.
20.Here is a side by side comparison between Tein HE's we removed and the new BC's BR Type Coilovers.
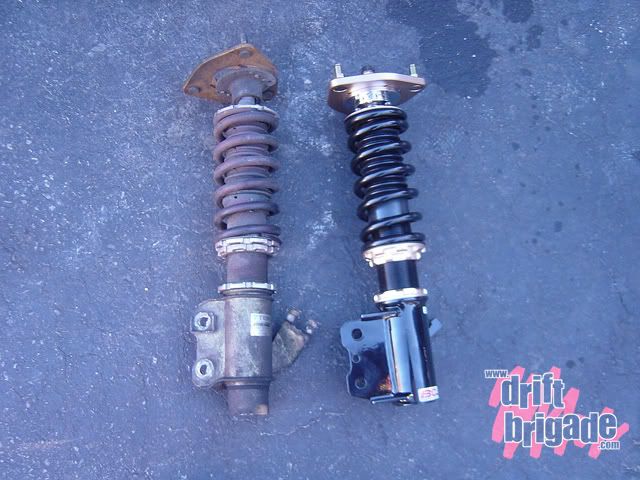
Visual Impression: BC Racing was kind enough to send us their new line of BR Type Coilovers. They came in a bright colorful sturdy package. They come carefully packaged with foam padded bags. The build quality is very good. The machining is precise, the casting and anodizing on the collars is superb. They did not skimp on the hardware. Powdercoating is clean and shiny.
Driving Impression: Street- On the way to practice, I drove on the street and immediately noticed the dampening was "friendlier" than my previous setup. This is mostly due to the spring rates of 8/6. Car was not overly stiff or bouncy. These rates are great for a car that sees a lot of street use.
Drifting Impression: Once we got to to the spot, I forgot to stiffen my settings before drifting but car felt stable and I didn't feel the need to get out and tighten it any more. I can't say that about my previous setup. Car felt stiff enough even with these rates and setting (3 clicks from softest setting) without being too jarring. In my previous setup I would almost always have it about 2 click from stiffest to feel stiff enough and it would be very bouncy. I have yet to drive these on stiffer settings. I will give review of that soon. I like that I was able to drive these hard on soft settings and drive on the street comfortably without getting out of the car. I know....lazy. BC is sending us 12/10 rates...review on those when they come in
for more info visit www.bcracin-na.com
1.Start by loosening lugs. Then Jack up the car and support it with jackstands.
2.Remove wheel to make things easier to work on
3.These 3 nuts on the strut towers will be removed.
4.Loosen the nuts. You will remove these after getting bottom half of coilovers unbolted.
5.You will need to remove brake line from coilover.
6.After it is removed, you are ready to unbolt lower half of coilover.
7. Loosen and remove the 2 nuts and bolts holding the coilover to the hub assembly.
8.Pull hub assembly away from coilover. You can now remove the 3 nuts completely off the tower. Pull the coilover out.
9.Grab the new coilover and feed it underneath the shocktower and make sure it is facing the right way and that you are installing the correct side. Yes, Left and right are different.
10.Make sure that the coilover is seated correctly by looking at top of shocktower.
11.You can hold the coilover assembly by finger tightening the nuts. This will allow a little play which will make bolting the lower half easier.
12.Next, you will want to feed the hub assembly into the coilover and install the nuts and bolts.
13.You can now tighten the 2 nuts and bolts. Note: If using camber eccentric bolt, you will want to make sure that these bolts are tight because bolt can slip and cause coilover to hit wheel depending on your offset. (don't ask how I know) Even if it is very tight, you will want to recheck after a few miles of driving as driving will wear off the powdercoating under the head of the nut causing it to lose grip. After that, you're all set.
14.Next tighten the 3 nuts on the shock tower. This is also a good time to install a strut bar if you want.
15.You can now tighten the brake line onto the coilover and move the steering wheel back and forth to make sure everything clears.
16.Rears are very easy, same idea as front but less to remove. You will remove these 2 12mm nuts.
17.Remove the big nut and washer holding the lower part of the coilover to the arm. After you slide the coilover off the lower bolt you will notice it is hard to snake out if not using a lift. You can take it out by standing on the brake assembly to pull it down. This gives more clearance to pull it out through the wheel well.
18.Snake through the new coilover using same technique as removing it. Feed the two studs through the shock tower and slide the lower part of the coilover on the arm bolt. Install washer and nut, then tighten.
19.Finally, tighten the 2 nuts onto the shock tower. You may want to adjust the settings at this time. First, turn it all the way to the right. Then count back to desired setting. Counter clockwise makes the setting softer.
20.Here is a side by side comparison between Tein HE's we removed and the new BC's BR Type Coilovers.
Visual Impression: BC Racing was kind enough to send us their new line of BR Type Coilovers. They came in a bright colorful sturdy package. They come carefully packaged with foam padded bags. The build quality is very good. The machining is precise, the casting and anodizing on the collars is superb. They did not skimp on the hardware. Powdercoating is clean and shiny.
Driving Impression: Street- On the way to practice, I drove on the street and immediately noticed the dampening was "friendlier" than my previous setup. This is mostly due to the spring rates of 8/6. Car was not overly stiff or bouncy. These rates are great for a car that sees a lot of street use.
Drifting Impression: Once we got to to the spot, I forgot to stiffen my settings before drifting but car felt stable and I didn't feel the need to get out and tighten it any more. I can't say that about my previous setup. Car felt stiff enough even with these rates and setting (3 clicks from softest setting) without being too jarring. In my previous setup I would almost always have it about 2 click from stiffest to feel stiff enough and it would be very bouncy. I have yet to drive these on stiffer settings. I will give review of that soon. I like that I was able to drive these hard on soft settings and drive on the street comfortably without getting out of the car. I know....lazy. BC is sending us 12/10 rates...review on those when they come in
for more info visit www.bcracin-na.com

Comment